In the era of constant connectivity, having your email set up on your Android smartphone is a necessity. Whether it’s for personal use or business communication, accessing your custom email on the go has never been easier. Here’s a simple guide to help you set up your custom email on your Android device using the Gmail app.
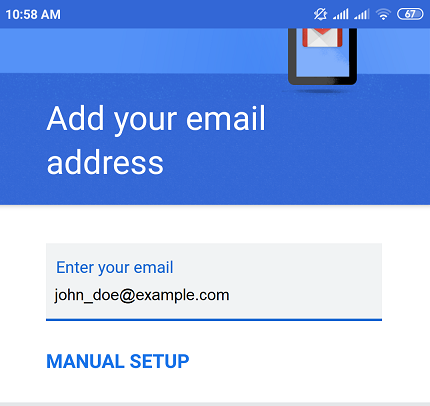
Begin by opening the Gmail app on your Android device. In the top right corner, tap your profile picture and select “Add another account.”
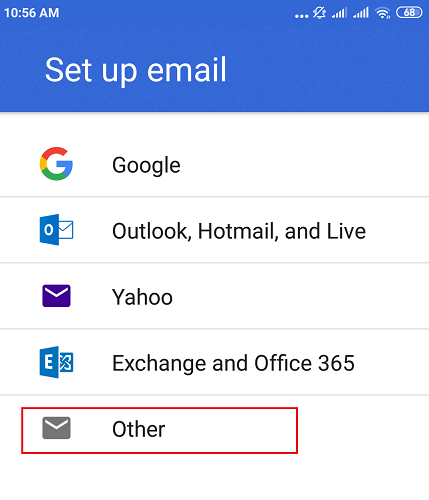
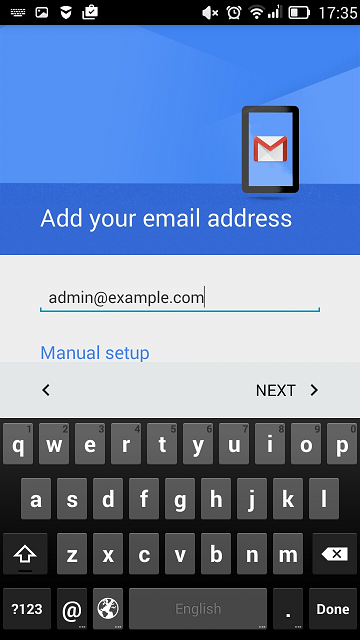
From the list of email providers, choose “Other.” Enter your email address and tap “Next.”
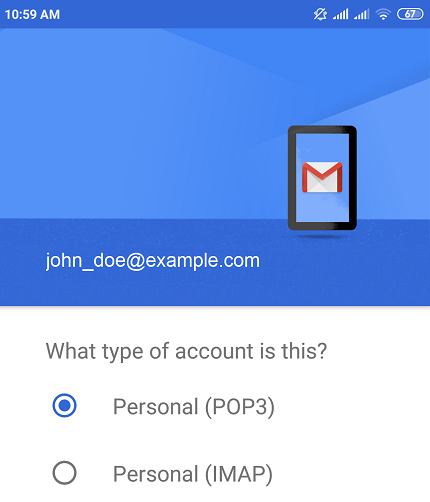
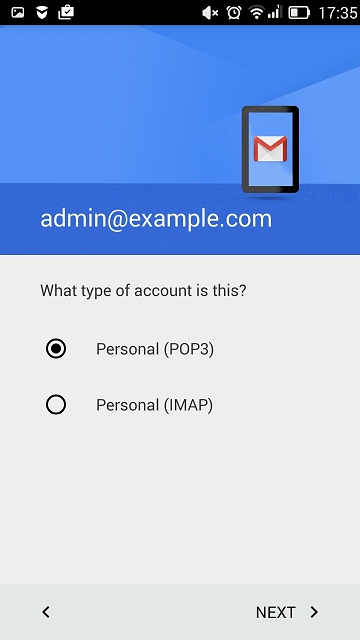
Choose the type of account you want to set up.
To keep copies of your email messages on the server, select “IMAP.” If you prefer not to keep them on the server, select “POP3.” Tap “Next” to proceed.
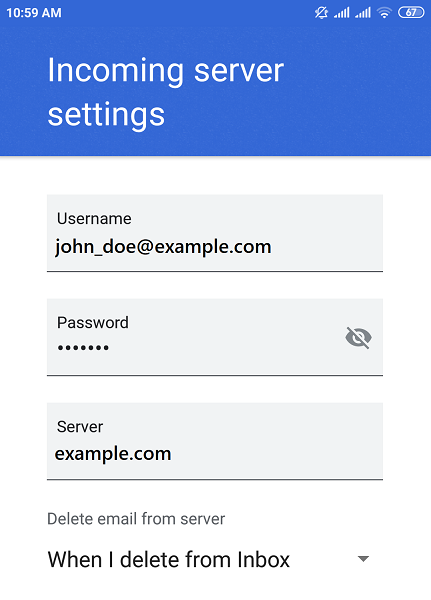
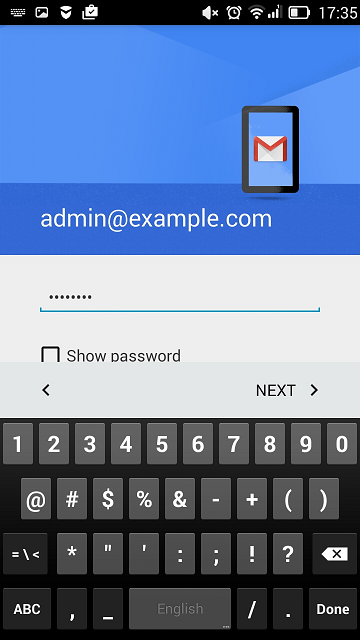
Enter the password for your email account and tap “Next.”
The Gmail app will automatically fetch the incoming server settings. You will be prompted to select whether deleting emails from your Inbox will also delete them from your Plesk server. Make your selection and tap “Next.”
If you encounter a “Certificate not valid” warning due to the mail server or domain not being secured with a valid SSL/TLS certificate, tap “Advanced” and then tap “PROCEED ANYWAY” to proceed via HTTP.
The Gmail app will automatically fetch the outgoing server settings. Again, tap “Next.”
You may see another “Certificate not valid” warning for the outgoing server settings. To proceed via HTTP, tap “Advanced” and then tap “PROCEED ANYWAY.”
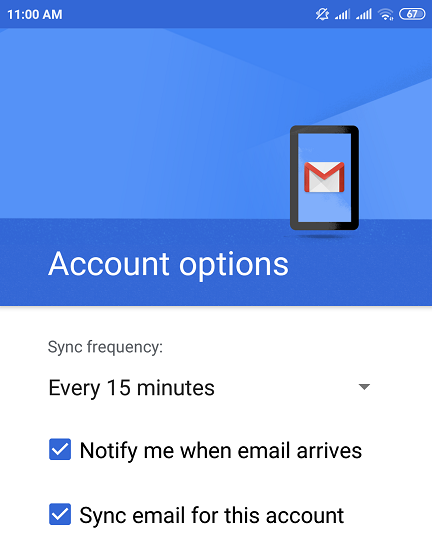
You can keep the default Gmail sync settings or customize them according to your preference. Tap “Next” once you’re done.
Optionally, you can change the account name and/or specify the name that will be displayed on sent messages. Tap “Next” to complete the setup.
To manually setup, follow the steps below:
Start by opening the Gmail app on your Android device. In the top right corner, tap your profile picture and select “Add another account.
From the list of email providers, choose “Other.”
Enter your email address and tap “Manual Setup.” Then, choose the type of account you want to set up. To keep copies of your email messages on the server, select “IMAP.” If you prefer not to keep them on the server, select “POP3.” Tap “Next” to proceed.
Enter the password for your email account and tap “Next.”
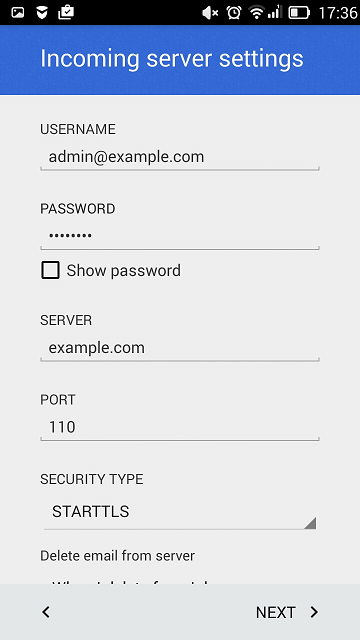
On the incoming server settings screen, specify the port number based on your account type:
- For POP3, enter port number 110.
- For IMAP, enter port number 143.
Tap “Next” after entering the port number.
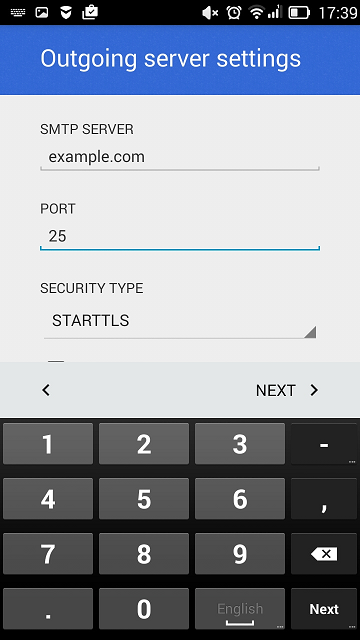
On the outgoing server settings screen, specify the port number 25 and tap “Next.”
Once all the necessary information is entered, your Android device will check the connection to the server. If the connection is successful, your mail account will be created and displayed in the list of accounts in the Gmail app.
Your setup is now complete. You can see your new account listed in the Accounts section of the Gmail app.
By following these straightforward steps, your custom email will be up and running on your Android device, keeping you connected and organized wherever you go. Enjoy the convenience of accessing your email seamlessly with your new setup.